ID Licensing
Overview
With ID Licensing in RLM Cloud, individual user accounts or groups can be assigned directly to individual license servers, providing greater control over licensing. Tying specific user accounts and groups to a license server, rather than providing a license to access the server, provides better control over licensing and greater assurance your licenses are only used by the user(s) that should be using them.

ID users can be added directly to one or more license servers. This can be done either through the server configuration (below), or directly from the Edit menu on the user.
Note
The Available Users menu will not display on the server configuration until at least one user has been added, but this will be fixed.)
Setup
Below you will find instructions for setting up your first ID licensing user. Note that these options will only be available after the beta has been enabled for your RLM Cloud instance.
Go to the Customers tab and click Add Customer to create a company and contact.
Click the Servers button for that customer.
Click Provision New Identity Based Server Instance for [contact] of [company].
If desired, select a Server Machine, Password, Contact, and add Notes. You can ignore the Select Users dropdown menu for now.
Click Provision Identity Based Server.
Click the Config button for your new server.
Click Add Licenses to add the desired licenses to the server. Click Write/Update License File on Server.
You are now ready to create and add users to your server.
Go to the ID Licensing tab.
Click Create New User.
Enter the email and password for the user, and any other fields, if desired.
In the Select Servers dropdown, locate and select your ID based server.
Click Add ID License User
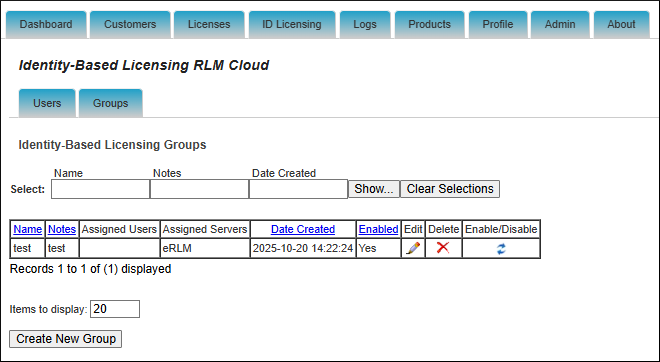
Groups (Optional)
In some cases, it may be desirable to assign groups of a users to a specific group. To create a group, go to the Groups tab and click Create New Group. Enter your group name, select any users you would like to add to the group, and assign the group to one or more license servers. Adding and removing users to the group, and server assignment can be done at any time.
Testing
The user may now connect using the SSO API endpoints. Please see the SSO API documentation for more information. ID users may also be created via the API. To test from the RLM client, RLM v17.0+ is required.
To use from the client:
int login_stat = rlm_id_login("username", "password");
if (login_stat != 0) {
    char login_stat_str[RLM_ERRSTRING_MAX] = {0};
    printf("Login status: %s\n", rlm_errstring_num(login_stat, login_stat_str));
    exit(1);
}
rlm_init(...);
rlm_checkout(...);
Configuring Custom Claims extension in Microsoft Azure Entra ID
Before you begin
Required for our claims endpoint:
Your Tenant ID.
Your Client ID/Application ID that the custom claim was added to.
These 2 values allow us to configure the claims endpoint to accept requests from your Entra ID instance. Without them the endpoint will reject requests.
Setting up the Custom Claims Provider
Create a Custom Authentication Extension
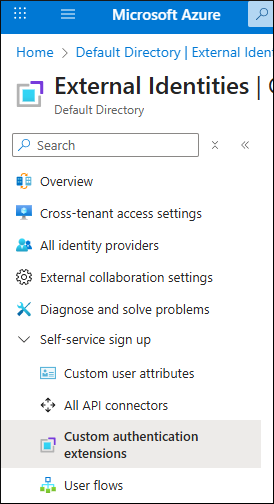
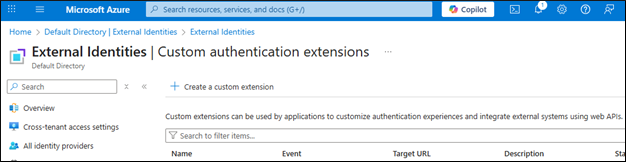
Go to Azure Active Directory → External Identities → Self-service sign up → Custom authentication extensions
Click + Create a custom extension
Choose: TokenIssuanceStart
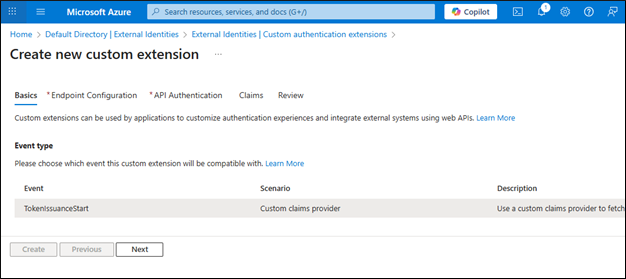
Next
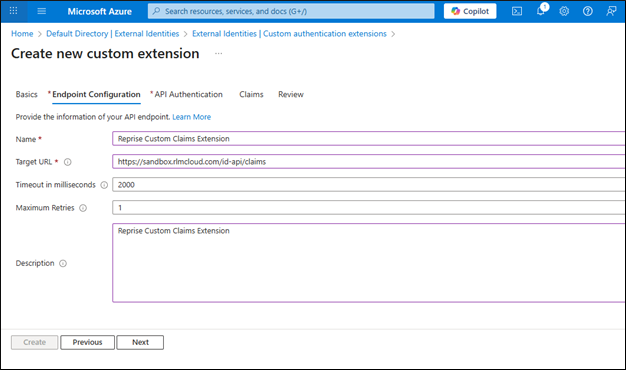
Fill in:
Name: e.g., Reprise Custom Claims Extension
Target URL: https://rlmcloud.com/id-api/claims
Timeout: Set as needed (default is fine)
Maximum Retries: 1 (default)
Description: Set as needed
Next
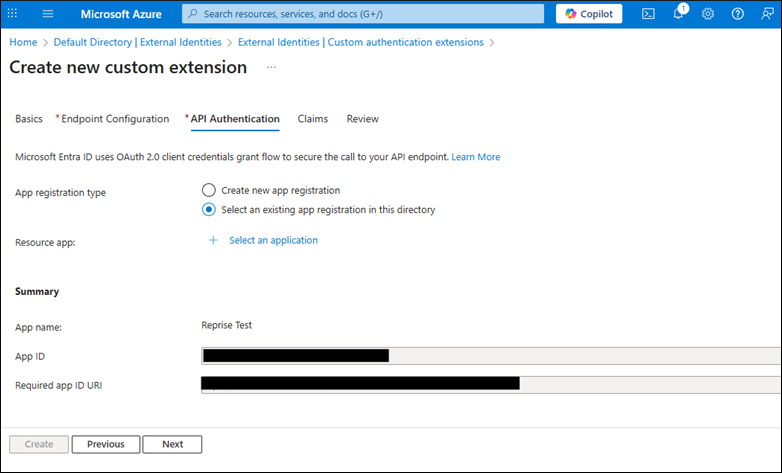
Choose “Create a new app registration” or “Select an existing app registration in this directory”
Ensure app has permission to receive custom authentication extension HTTP requests.
For internal testing we use a previously set up “Reprise SCIM Provisioning” Enterprise Application.
Next
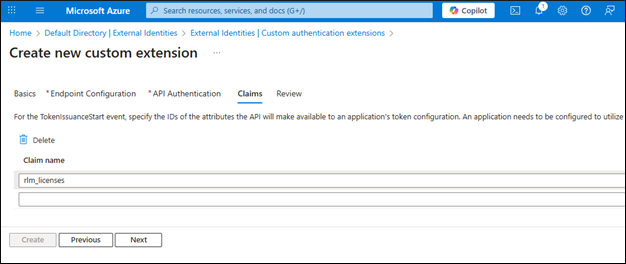
Add a new Claim name: “rlm_licenses”
This is what the claim will be labeled as that will contain the CUSTOMER licenses granted to the user. This must match what our endpoint returns.
Review and Create.
Assign the Extension to an Application
Go to Azure Active Directory → Enterprise Applications
Select the application you want to use the claims extension with.

Go to Manage → Single Sign-On → Attributes & Claims
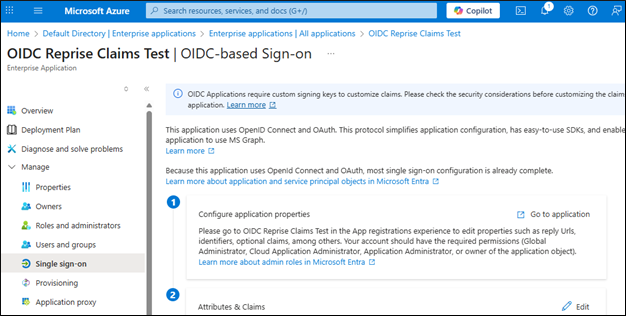
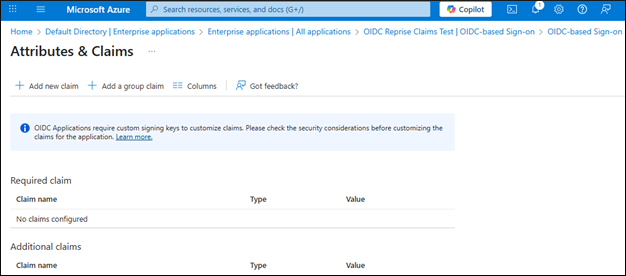
Click + Add new claim
Name: rlm_licenses
Source: Select Attribute
Source attribute: customclaimsprovider.rlm_licenses

Save
You’re done!
Azure Entra ID will now call our claims endpoint and include your custom claims in tokens for assigned applications.
Test it out!
Once you have the claims extension set up and have a Reprise Identity Licensing user provisioned with a server attached you are ready to test. We can piece together an authorization request URL and redirect it to Microsoft’s JWT test website (https://jwt.ms) to view the contents!
https://login.microsoftonline.com/{Tenant-ID}/oauth2/v2.0/authorize?client_id={App_Client_ID}&response_type=id_token&redirect_uri=https://jwt.ms&scope=openid&state=12345&nonce=12345
If the account you authenticate with has an email value that matches an email provisioned in Reprise Identity Licensing feature, then a new custom claims value labeled “rlm_licenses” will be added to the token returned and will contain the CUSTOMER license lines entitled to that account.